Timekeeper OTA630 and W630 software in detail
| Operating manual of : |
| Timer OTA630 | Software W630 |
|
|
| QuickStart |
- Install the W630.
- Copy the file Listcart.tps (received on your email) to the directory .. \Vedex\W630\Cards.
- Create your personnel file.
- Insert a USB flash drive on your computer (even a small key of 256 MB is enough).
- Make a transfer (Transfer and Transfer menu). The personnel file will copy the key.
- Connect the recorder.
- Insert the USB key on the recorder.
- Swipe the master. The menu appears.
- Pick 4 (USB) keyboard and 4 (import white list).
- The jig is operational, you can clock on.
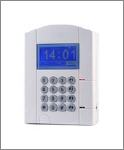
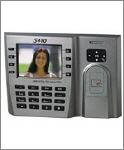
| Discover clocking OTA630 |
- 1000 users
- 24,000 records
- Battery autonomy
- USB transfer

|

|
|
|
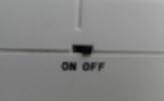
This is not a network socket : do not connect a cable. Connect the power supply to the jack. |
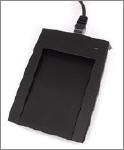
USB socket by lifting the plastic cover. | ON, the battery is charging and operation in case of power failure, it keeps the time clock operation. |
Warning : the master and transfer cards have a unique number. Losing the card reader requires you to return to the clocking Vedex for re-registration card = unavailability of the timeclock for a few days plus cost of transportation and a map. Losing the card transfer is less serious because you can do the same functions with the master card. It's just less convenient and the card reader allows access to sensitive functions.
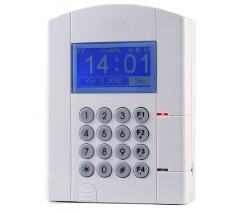
| Connecting the clocking |
The clocking OTA630 comes with food (220vac/9vdc). Sign, off the jack below the recorder. Then, plug the power supply into an AC outlet. The little switch on the right side is used by the battery. ON, the battery is charging and operation in case of power failure, it keeps the time clock operational for about four hours (new battery). OFF, the battery is not charging and not take over the sector in case of power failure. Please leave the switch ON. The memory and time are saved by an internal battery even when the battery is discharged. If left unused, turn the switch OFF.
The RJ in the clocking is not an outlet. Do not plug a network cable into this port on pain of damage to your network.
Warning : do not use other power supply than the one supplied with your recorder.
| Clocking in |
Just pass the card a few centimeters from the timeclock, at the keyboard. If the employee's name appears, the score is accepted. If the reference appears « Carte_interdite » : card is forbidden on the time clock, permission is given for each clocking the bottom of the personal record of the employee (see screen below).
![]()
W630 & W300 pointeuses autorisées
If only one card is displayed : this card is not part of authorized cards in your software.
| Set at the time recorder |
Pass the master card. From the menu, press 1 (system settings), then 1 (Last time) and enter year, month, day, hour, minute and seconds. Enter the digits with a 0 in front for values below 10. The # key valids. The « * » button exits without saving.
Warning : time is returned in English format by year, month, day, hour, minute and second.
| Get Scores on the USB |
With the master card (menu access all)
- insert the USB into the recorder.
- pass the master card.
- from the menu, press 4 (USB)
- then 1 (export records)
- wait for your export records OK
- press « * »
- If you have made changes in personnel (new, delete, change numbers, etc ...) :
- rewrite the master card
- from the menu, press 4 (USB)
- then 4 (import white list)
- wait for message « import white list OK »
- press « * »
With the card transfer (limited menu)
- insert the USB into the recorder.
- move transfer card
- press 1 (export records)
- wait for the message OK export records
- then press « * »
- If you have made changes in personnel (new, delete, change numbers, etc ...) :
- Pass again transfer card
- Press 4 (import white list)
- wait for your message « import white list OK »
- press *
| Installing W630 |
First of all, close all running applications, word processing, spreadsheet, browser, etc. ...
Insert the CD ROM software support W630. After a few seconds, the screen appears facility (it is actually a small website recorded on the CD) into your drive internet (usually Internet Explorer). Click on the photo clocking OTA630.
Click Install W630.
Then follow the directions of the module accepting the installation directories and the choices proposed by default.
The Applications group Vedex was created in the Programs part of your computer. This one included W630 Control Scores and W630 instructions. Also an icon is placed on your desktop.
| Easy Start |
In the following terms, we'll explain how to implement quickly the software W630.At launch, you position on a screen. This screen is divided in two parts :
- Area Menu
- Active zone
As his actions you will perform these areas will change according to needs and circumstances. Still, a little like browsing the Internet, it will be possible to leave the active window by action in the menu area.
In this area, we find, to start the following :
- Transfer : transfer data between USB and PC
- Correct : visualization and correction scores sent
- Print : Print reports
- Staff : access to records personnel
- Settings : software settings
- Utilities : Purge, backup and indexing
- Exit Vedex W630
We return later to the various elements that make up the menu, the present purpose is to help you with a quick setup of your installation.
The startup screen matches the one indicated below.
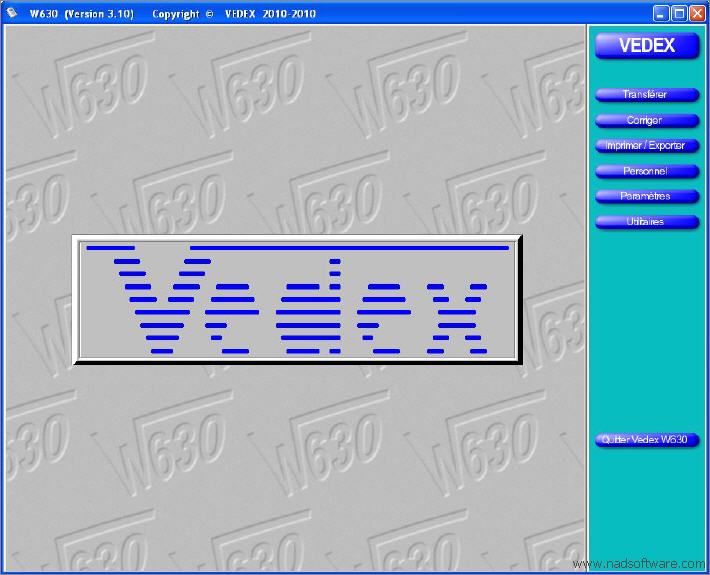
W630 menu à droite
If the bottom of the main screen is as follows : your software does not contain the file aliases ListCart.tps. This file is provided to you on your email by your dealer. The software is in demo mode without this file.
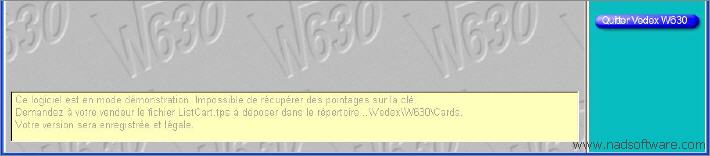
W630 menu principal en mode démonstration
| Staff |
The next phase involves the integration of all data on your personal identity, in and out daily, etc. …
If you click the Personnel button, you'll be presented with a new screen, empty for the moment, like below.
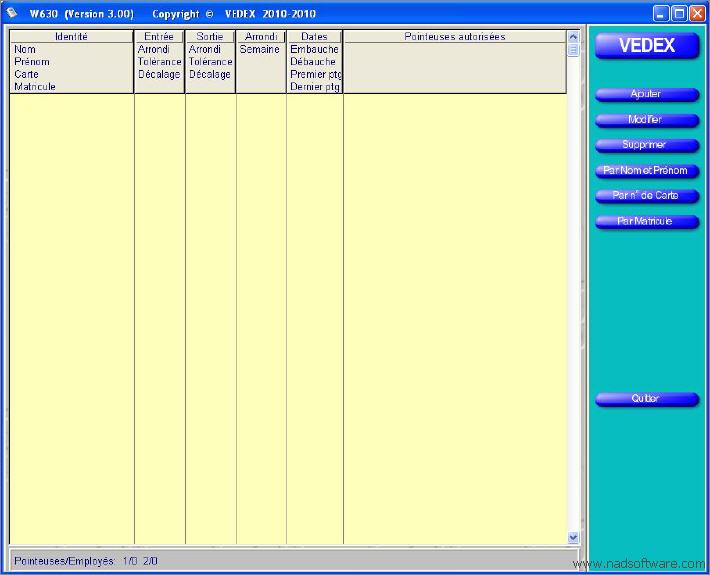
W630 & W300 écran liste du personnel
To start and insert your personal data, click on the Add button. The following screen is displayed.
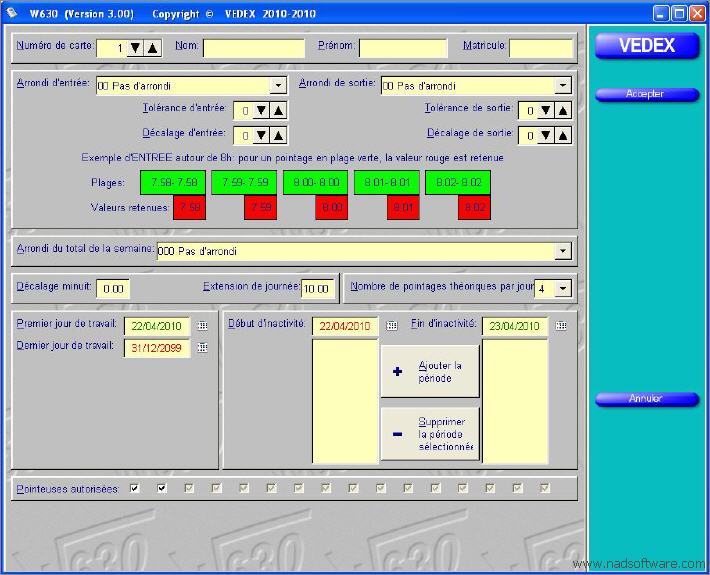
W630 & W300 fiche personnelle
Detail, one by one, the different parts of the screen :
Identity
![]()
W630 & W300 fiche personnelle
By default, the card number is initialized to 1 but nothing prevents you to change this number at the first introduction. Enter the desired number directly, the latter must, of course, be between 1 and 9999.
Pressing the TAB key allows you to gradually fill the following fields, name and number.
By default, it takes the card number preceded by zero. You can, if you wish, change the registration number as below.
![]()
W630 & W300 fiche personnelle
Data pointing
Your staff never coming to a fixed time, you should determine time slots to round off the scoring (in short: a slice initiated input or output is not counted). There is no obligation to rounding.
Rounding the entry or exit back one hour to indicate actual score for all the scores made on a predetermined period of time.
Tolerating the inputs and outputs condones the delay of entry or exit advances your employees.
To help you with configuration of rounded, green and red areas of the screen are changing gradually as your manipulation, to give you an overview of the result in scores.
Note: This box shows an example applied to the inputs when you change any of the controls left and shows an example applied to the outputs when you click one of the elements of the right area.
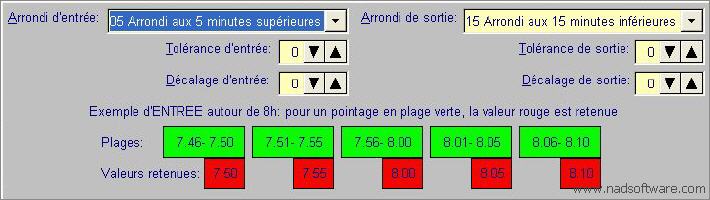
W630 arrondissement des pointages d'entrée
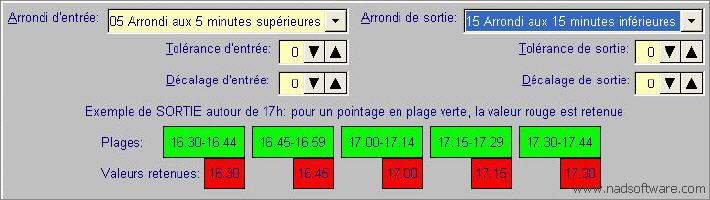
W630 & W300 arrondissement des pointages de sortie
Clicking on the arrow to select the Rounded total of the week, you will choose to supplement the employee's total weekly, hour less time than through different stages of rounding.
![]()
W630, W300 & Wcr2 arrondissement de la semaine
| Total scores | Type round | Result |
| 35h04 | 000 No rounding | 35h04 |
| +05 Rounded up to 5 minutes | 35h05 | |
| +10 Rounded up to 10 minutes | 35h10 | |
| +15 Rounded up to 15 minutes | 35h15 | |
| +30 Rounded up to 30 minutes | 35h30 | |
| +60 Rounded up to 60 minutes | 36h00 | |
| 35h47 | 000 No rounding | 35h47 |
|
-05 Rounded down to 5 minutes |
35h45 | |
|
-10 Rounded down to 10 minutes |
35h40 | |
| -15 Rounded down to 15 minutes | 35h45 | |
|
-30 Rounded down to 30 minutes |
35h30 | |
|
-60 Rounded down to 60 minutes |
35h00 |
Then specify the number of daily scores. By default, the number is 4 but you can score in the case of an employee working half-time fix the number to two or even consider breaks or other factors and fix 6, 8 or 10, etc. ... This theoretical number used to locate employees quickly out of the way expected.
![]()
W630 & W300 décalage du point minuit
The midnight shift is a fixed value indicating the change of day.
Suppose you enter the value 6.00. The scores recorded between 6.01 D-Day, and 6.00, Day +1, will be written on the D-Day.
The extended day program tells the W630 the maximum time during which it is authorized to seek a score, the next day to finish one day.
The extension applies only if the final score of the day, recorded, is a starter of the day. The extension can be applied once a day. If your staff working after midnight, specify a period that will achieve, since the last entry of the day, pointing out the next day. The extension simplifies the scheduling of type 3x8 automatically lengthening the day after midnight for a night shift and allowing normal day for other types of schedules.
Note: The offset is a static change of day (fixed value) while the expansion is a dynamic system (the day changes within a maximum of X hours after the last entry and immediately after the last exit).
The dates of hire and departure
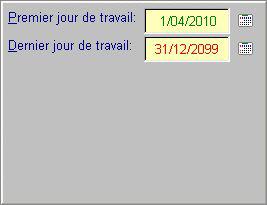
W630 & W300 dates d'embauche et de débauche
By default, when you create the form of one of your employees, his first working day (hiring) receives the date of the present day and time of last day of work (leave off work) receives the value of December 31, 2099.
You can, of course, change these values, both for the first day on the last by clicking on the small calendar located next to each date.
When you finish recording your staff and you click the Accept button, you return to the home page menu of Staff. This page is no longer blank but gives a list of all employees that you have created. In the menu area, three buttons allow you to list your employees, either by name and first name or by card number or by Matricule.
If you want to modify information about one of your employees, simply select the employee and click on the Edit button. It is also possible to open the file modification by double-clicking the mouse on the concerned employee.
You can proceed in the same way, to remove the plug of an employee who left the company.
But be careful : remove employees also deletes all its historical scores. In the Go further, it is explains how you can keep an employee's background, but can use this card again.
If you've followed our instructions so far, your screen should now look similar to the one below.
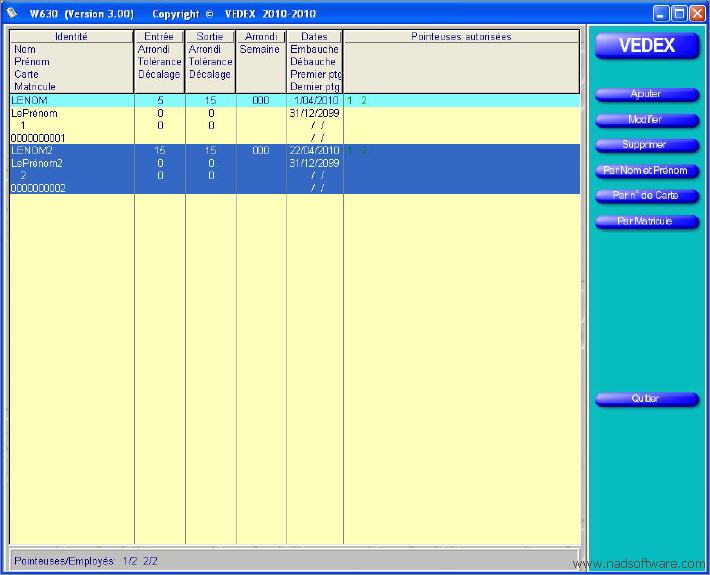
W630 & W300 écran liste du personnel
At this point, your software is fully informed and can now record the scores of your employees and make the necessary corrections, depending on the configuration of the rounding.
The system is operational, we can now proceed to the phase of information retrieval score.
| Transfer |
Clicking the Forward button causes the opening of a new screen and the search for the USB connected to the PC.
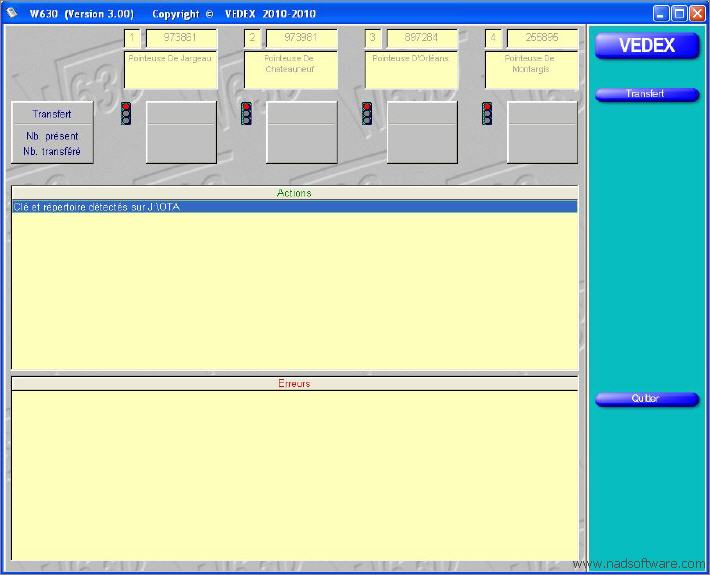
W630 écran de récupération des pointages
A click on the Transfer button launches the collection of information stored in the key. The collection is automatic and, at this stage, you have nothing to do. Just wait until the transfer in progress.
At the top of the screen you can see :
number of clocking, serial number and the name of the clocking,
the number of scores on the key and the number of scores transferred by the software
The transfer operation retrieves scores and updates the database of names and surnames.
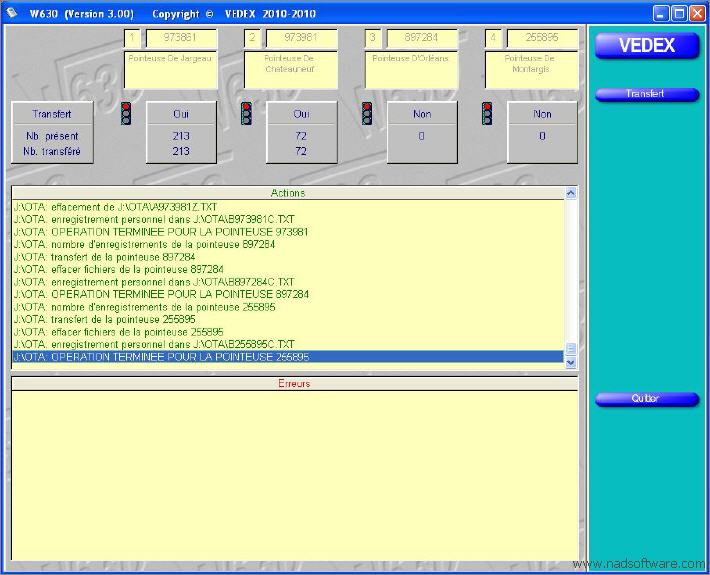
W630 écran de récupération des pointages
Note: the Action box gives you information on the progress of implementation. The error box will inform you of possible errors. A good transfer should not show errors. Wait a few seconds before removing the key : Windows differs writing on removable media.
Correct
The information has now been collected on the key, the next stage will correspond to the control of these scores and their correction. Press the button «Corriger » and open a new screen like the one below.
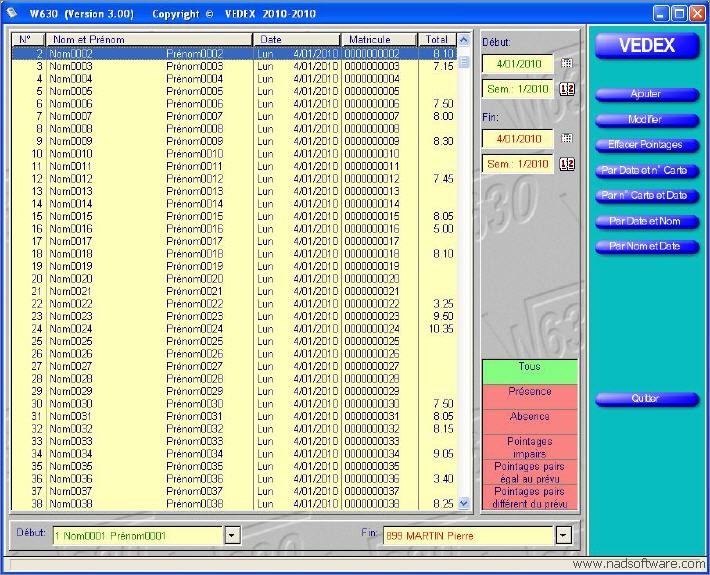
W630 & W300 écran liste des pointages
Let's see, step by step, the various elements of this screen.
The central part of the screen contains the list of your recordings. With buttons « By Date and Nr Carte », « Carte Nr. and Date », and « By date et Name » you have this list on the screen as you see fit. However, this list can be filtered using different elements of the right and lower screen.
At the bottom of the screen, you can limit your list to the employees. For example, you can edit on screen to the scores of employee 1 to employee 6.
At the upper right, you can run in this time scoring list. We see in our example above that we are only interested only scores made on 04/01/2010.
At the bottom right, it is also possible to filter this list according to various criteria :
- All : This option will display all scores ;
- Presence: you view, in this case, the list of those present ;
- Absence : you see your employees' absences ;
- Scores peers, equal to the expected : the personal record of each employee, you have identified a number of scores daily. In this case, you will display the list of employees whose daily matches the number indicated on their personal record ;
- Scores peers, the expected different : you will display with this filter, the list of employees who have performed in a day, an even number of scores but does not match what you specified in the personal record ;
- Scores odd : you will display with this filter, the list of employees who have performed in a day, an odd number of scores. With this filter, you'll notice, for example, omissions of scores.
These filters can help you in your research before moving to the correction of scores, if necessary. Assuming you are looking for all the lapses of scores of your employees, you use the filter - - - Scores odd or No to trim work.
| Correct part |
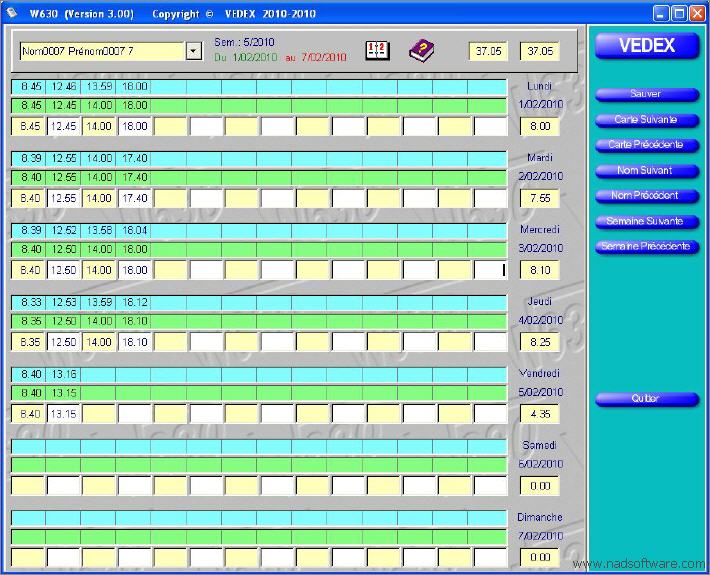
W630 & W300 écran de correction
After establishing the list of scores that interest you, you can now view the scores for each employee on a daily basis and make any necessary changes necessary. To toggle the screen correction, just double-click on any employee's line.
Further detail on this screen.
At the top, are written the employee's name and card number concerned by the verification and indicates also which week is checked on.
For each day you see three lines of data.
The first, on a blue background, indicates the real clockings in of the employee on the clock or line of origin. This line cannot be changed and remains a reference.
The second, on a green background, matches the recordings of these scores after treatment with the W630 you have rounded to that employee, it is also called line program.
The third line, is equal to line 2, but you can make corrections if you wish. Clockings in are positioned on a yellow background while the clockings out are settled on a white background. This line is called the line user. W630 does not transfer over the contents of line 2 on line 3 as soon as you make a change (line 3 different from line 2).
For example, one employee has forgotten to click on : While for a day, you have the first three scores and their corrections, the fourth is missing. You can, by moving the arrow keys, go directly and introduce the exit time missing. Pressing Enter or arrow keys or TAB valid information inserted.
When you change from week or card number, W630 will offer to save the information that you just inserted into the screen.
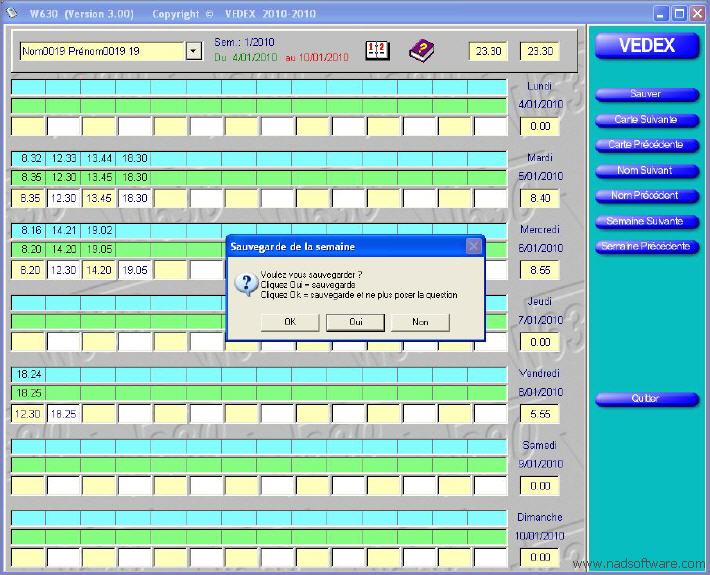
W630 & W300 écran de correction
Warning : If, at the request of the software, you click OK, the question will not be asked in the future and you change the data will be saved automatically.
At the right side of the screen under each date, you see the cumulative daily employee (line 3 or line user).
With the buttons on the left menu, you can browse at will for weeks and used to verify all data scoring and make the necessary corrections. . Pressing the button Save or Exit you go back on the menu screen correction, with its filters system.
Shortcuts, which you can view the list by clicking on the icon ? allow you to enter and navigate the screen without using the mouse.
In this screen, you have three buttons that we have not used yet, Add, Edit and Delete scores.
The first two buttons allow you to either insert a record, or to modify the content, as we have seen just before. These data will always be introduced at the third line of the day, or online user. It will never be possible to modify either the original line scores, or corrected by the line W630. Similarly, pressing Clear Scores remove the values entered in the third line, without altering the other two.
| Printing data |
When you click the Print button on the homepage, you open a new window, same as below.

W630 écran imprimer ou exporter
At the top of the screen, you will determine the type of editing you want :
- the listing of employees, including the information relative to the person, name, card number, service number, and rounded values of the different periods of inactivity;
- identification of user scores (third line displays correction) with daily totals, weekly totals of the rounded light week for each employee selected, and this over a maximum period of five weeks. A page is reserved to each employee;
- identification of user scores (third line displays correction) with daily totals, weekly totals of the rounded light week for each employee selected, and this over a maximum period of five weeks. Listing continuous;
- the reading of original scores (scores on the real time clock) and user (the third line displays correction) with daily totals for each employee selected, and this over a maximum period of 31 days. A page is reserved to each employee;
- the reading of original scores (scores on the real time clock) and user (the third line displays correction) with daily totals for each employee selected, and this over a maximum period of 31 days. Listing continuous;
- the statement of total per week for each employee with management's rounding week and this over a maximum period of five weeks;
- identification of a defined period totals per employee and the grand total for all employees;
- a test report, including the three lines of the screen correction, for a week, with management's rounding week. A page is reserved for each employee.
According to the type of editing you choose, the bottom of the screen will enable the application of certain conditions for the creation of your edits. If the condition is applicable for one edition, it is shown red if it is not applied and green if it is successful. If the condition is grey, this means that we can apply it on the chosen edition.
For example, you wish to print the personnel list. Only those conditions apply Sorted by number, Sort by name Sort by number ; condition chosen in our example is provided by number.
Different conditions are available :
- schedule display in hours and minutes or hours and hundredths;
- selecting the starting and ending dates by keyboarding the week number;
- selection starting and ending dates by keyboarding the day;
- sorting by number, name or number, bounded between two elements shown on the left.
If you click the Print button in the menu area, you open a printer driver which you have an overview of the edition you have requested. If you are not satisfied with the editing required, close this screen to return to the generator editions W630. If you only want to print, simply click on the printer icon.
| Example editing |
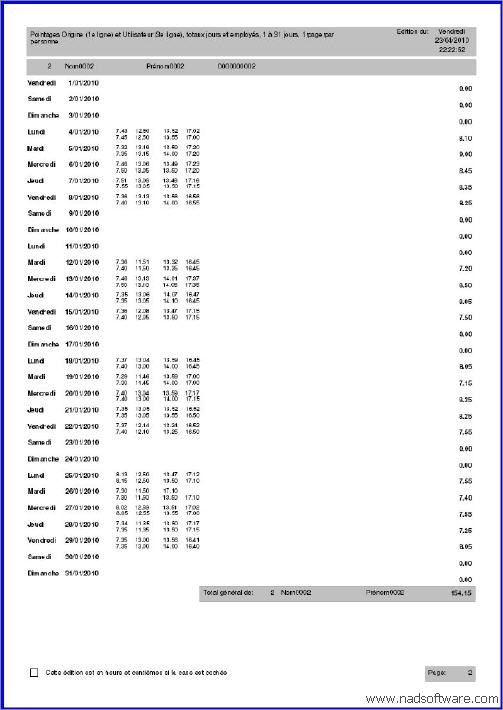
W630 ou W300 édition
| To go further with W630 |
In the previous paragraphs, we have seen how easily start the W630 software, the setup and use. Other features can be requested, as appropriate, by some users. For them, we will return in more detail to the W630 menus.
| Settings |

W630 écran des paramètres
Summary on the right or left
Clicking on this tab, you open a window in which you are permitted to place at your convenience, the menu area to the right or left of the screen. To place the menu on the right of the screen, simply check the box in the active window, as below.
![]()
|
|
|
|
|
Clocks used
You can name your clocks. If no serial number of clocks appears : you do not have ListCart.tps file in the directory ..\Vedex\W630\Cards.
Password
The application can be protected by a password Optional 1-20 characters. The second entry is for control. The upper or lower case are not analyzed. Use a password ... you can remember easily.
Confirm your changes by clicking the Accept button.
| Staff |
Assignment clocks
You are limited to 1,000 people by clocking system with W630. If you use multiple clocks, W630 gives you the option of allowing certain employees to perform their scores IN/OUT on several devices.
Whatever the assignment is given to a time clock, or to multiple clocks, the award is made at the personal form.
In the home page, click Staff.
At the right side of the screen, in the column entitled clocks, are, for each employee, the numbers of clocks where they can validate their inputs / outputs. At the bottom of the screen, you have the number of employees by clocking.
By using the ↑ and ↓ keys select the employee you want to modify access to clocks.
Click on the Edit button.
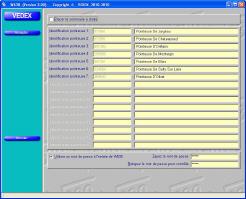
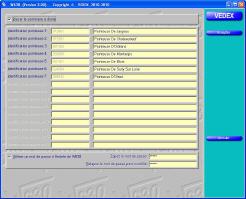
In the data sheet for the employee who has just opened at the bottom, we note that there are as many boxes as valid clocks installed.
![]()
W630 & W300 pointeuses autorisées
To allow this employee to point to one or other of the clocks, or all, just check the box and leave this page by clicking the Accept button.
You can read the result immediately in the screen of the personnel, under the column clocks used. The terminals on which the employee is allowed to point are marked in green. In this example, your facility has seven clocks and the employee is validated on the 1, 3, 4 and 7.

W630 & W300 pointeuses autorisées
Remove
When one of your employees leaves the company, it must be able to remove its MSDS system. Nevertheless, when you remove its data sheet, you have to make sure that there are no more records about this employee in the clock memory, otherwise, W630 notify you of errors on scores during the next transfer.
click Personal;
select the employee by using the ↑ and ↓ keys;
click Delete button;
when you are asked to confirm the deletion, click OK.
The removal of an employee also removes its history. A total annual hours will no longer be possible.
Rename
To keep the history of an employee, without removing the data sheet and while recovering his card :
click Personal ;
select the employee by using the ↑ and ↓ keys ;
click on the Edit button ;
change his card number and his official number by using a high number (eg 12 becomes 1012) ;
assign him his date of departure (he will no longer part of the lists of absent) ;
shoot all the boxes clocks allowed for the employee (it will occupy more useful place in the time clock).
Inactvity periods
The periods of inactivity (not to be confused with the dates of hire and departure) you can tell the software W630 that for a given period, an employee is absent from work and it is useless to treat information concerning him during this periodes.
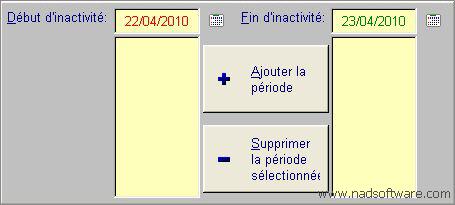
W630 & W300 périodes d'inactivité
You can, for example, you use these periods to indicate the periods of inactivity of a temporary, etc…
To create a new period of inactivity, click the calendar to the right of the Start box of inactivity and choose the start date. Click on the calendar to the right end of the zone of inactivity and choose the date of end. Then click the Add button the period.
To delete a period, click to select and then press the Delete button the period of inactivity.
Departure date
As an employee leaves the company, you can specify a leaving date.
| Transfer |
Errors to detect the key
If you do not have properly connected your USB to your computer or if there is any problem in the link, you'll end up with an error message to the transfer request. The display closes automatically after 2 seconds.
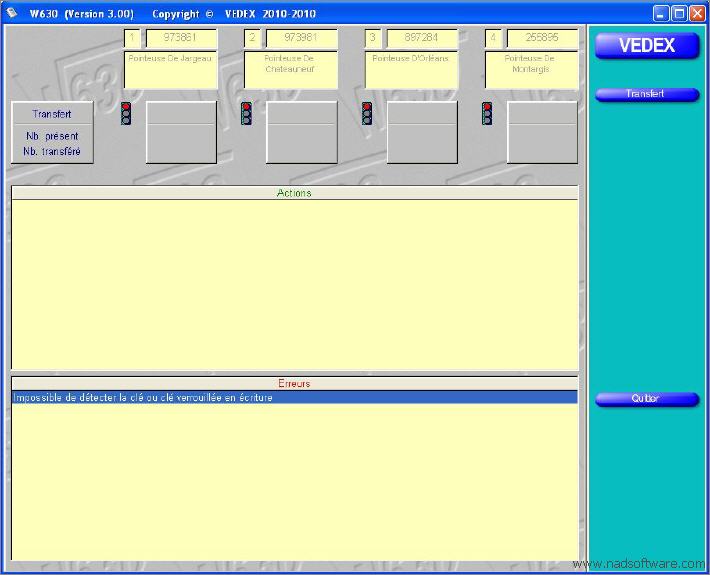
W630 écran de récupération des pointages
Some solutions
remove the key-wait a few seconds-then connect again the key
wait until Windows detects it
check in Explorer it appears wellverify that there is not another key: W630 finds the first key in the order Windows resgisterseach key connected
Errors when transferring scores
W630 encounters anomalies in the data transfers, it opens at the end of transfer a special screen where you are given the data that are not true.
These anomalies may correspond to :
an emplyee's scores in a period of inactivity,
an employee whose personnal data have been deleted,
an employee to whom you've submitted a card without having established his personal record
an employee considered as not hired
The following screen is displayed.

W630 & W300 pointages en erreur après récupération
Following the comments you will read in the main window, at each pointing, you can keep these scores (by clicking the button Keep) and go back to the menu for staff amend the records of employees (create a file, edit a period of inactivity, etc. ..).
If you do not want to keep these scores, simply click the Delete button.
How data are stored ?
When you transfer data from the time clock, W630 will load the data from the file Origin00.txt subdirectory Data. The software then scans the file and if it encounters anomalies, he intends to keep or delete records. If you decide to keep these records, the file Origin00.txt is not altered, giving you the opportunity to rectify the anomalies. At the contrary if you decide to delete these data W630 will shift all the files Origin01.txt to Origin49.txt from Origin02.txt to Origin50.txt, shift Origin00.txt from Origin01.txt and to create a new file Origin00.txt, totally empty.
It is possible to access the scores by opening the file OriginXX.txt with Notepad, for example.
The format data is NNNN,DD/MM/YYYY,HH.MM,TT (NNNN representing the card number, DD/MM/YYYY represents the date, HH.MM representing time and TT representing the pointing device).
You can optionally use these data for export scores to another application, the files being used in txt format.
| Utilities |
If you click this button, you will be positioned on the next screen.
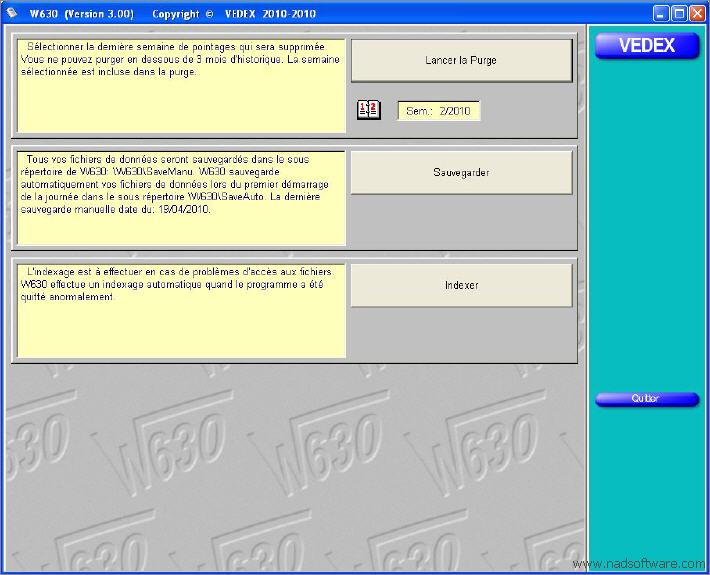
W630 & W300 écran utilitaires
This screen offers three operations, indexing files, backup files and purging them.
Purging files
This allows you to delete the memory of your computer's oldest records pointing to not clutter its memory.
However, it is impossible to delete records if they have less than three months.
To purge the selected end date purge want by clicking on the calendar then press the Start purging.
Backup files
W630 duplicate files each time you start the day. Data are stored in the directory C:\Vedex\W630\SaveAuto. For security, nothing prevents you from saving these data at any time. In this case, they will be saved in the directory C:\Vedex\W630\SaveManu.
The saved files have names Parametr.tps (save installation settings), Personne.tps (data backup personnel), PointVal.tps (save scores recorded) and historical files Originxx.txt.
W630 also informs you of the date of the last backup manually.
Indexing files
This choice is to use in case of anomalies during file access. In itself, W630 handles already re-indexing these files in case of abnormal closure of the software (eg computer crash during a power failure).
| Frequently Asked Questions |
How to re-use the card of an employee who has left
To keep the stored data of an employee, without actually removing the sheet, while retrieving his card for a new employee :
click Personal
select the employee by using the ↑ and ↓ keys
click on the Edit button
change his card number using a high number which the card is absent (eg 12 becomes 1012)
change his registration number if you use predicated numbers (eg 0000000012 becomes 0000001012)
set him about his departure date (he will no longer part of the lists of absent)
uncheck all the boxes "clocks authorized" for the employee (he will not occupy valuable space in the time clock)
How to remove an employee who has left ?
When one of your employees leaves the company, it must be able to remove its MSDS system. Nevertheless, make sure when you remove this emplyee's sheet that there are no more recording IN/OUT in memory, or W630 will warn you of errors on scores during the next transfer.
click Personal
select the employee by using the ↑ and ↓ keys
click the Delete button
when W630 asks you to confirm the deletion, click OK
The removal of an employee also removes its background. A total annual hours will be no longer possible.
How to set the timekeeper right ?
Pass the master card. From the menu, press 1 (system settings), then 1 (Last time) and enter year, month, day, hour, minute and second. All values below 10 must be preceded of « 0 ». The # key valid. The button « * » exits without recording.
Warning: time is returned in English format by year, month, day, hour, minute and second.
Should I import the white list every time ?
No, if you do not change anything on the staff since the last time (creation, deletion, change of recording devices allowed, rename people, etc. ..)
Which key should I use ?
20,000 scores occupy about 1 MB on the key. The keys go well beyond the capacity (256 MB to several GB, 1 GB = 1024 MB), so any key can be used (formatted FAT32). Book still a key for single-use recording devices (initially empty). The same key can be used to transfer multiple clocks without having to go back on the computer between each discharge of clocks.
How to change the application of computer ?
Re-install the software . If you have lost your CD, you can install the software from the site www.vedex.com. Retrieve the contents of C:\Vedex\W630\Data (these are your data) from your old computer and put it back in the same place on the new.. Do the same with the directory C:\Vedex\W630\Cards (this is the file number of aliases between employees and real number of chip cards).
Why does the timekeeper stop despide of the batter
Actually, your time clock is not stopped. When the time clock runs on battery, the backlight of the display is turned off to save energy. He turns back to score for a while.
How are data stored ?
When you transfer data from the time clock, W630 will load the data in the file in the Origin00.txt Data directory. The software then scans the file and if it encounters anomalies, he intends to keep or delete records. If you decide to keep these records, the file is not altered Origin00.txt, giving you the opportunity to rectify the anomalies. If, on the contrary, you decide to delete these data, W630 will shift all the files to Origin01.txt Origin49.txt to Origin02.txt to Origin50.txt, shift Origin00.txt Origin01.txt and to create a new file Origin00. txt, empty of all content.
It is possible to access the scores by opening the file OriginXX.txt with Notepad, for example.
The data format NNNN,DD/MM/YYYY, HH.MM,TT (NNNN representing the card number, DD/MM/YYYY represents the date, time and representing HH.MM, TT representing the pointing device).
You can optionally use these data for export scores to another application, the files being used in txt format.
What is the use of AllOri.exe ?
This utility is included in the directory C:\Vedex\W630\Data. It allows the concatenation of all files to Origin00.txt Origin50.txt. These files contain your last 50 transfers. They are already incorporated in the database when you exit the screen transfer and remain present for maintenance and for a limited time. AllOri les regroupe dans Origin00.txt. Allori combines them into Origin00.txt. Once in Origin00.txt, the act of going into the transfer screen and leave, causing a new incorporation of these data in the database. Use it if you think you have lost scores or if the main file of your database is problematic.
NadSoftware.com: vente de pointeuses (pointeuse) et badgeuses (badgeuse) en hors taxe.
NAD Software: auto-entreprise en franchise de TVA.
NAD Software: pour les particuliers, professions libérales, entreprises ne récupérant pas la TVA et entreprises ne voulant pas avancer la TVA.
Distributeur des solutions Vedex.
Pointeuse, pointage des temps de travail, pointage des horaires, gestion du temps, absence, présence, crédit, débit, heures suplémentaires, heures de nuit, pointeuse digitale, logiciel De pointeuse, pointeuse biométrique, achat pointeuse, fournisseur de pointeuse, pointeuse de magasin de grande distribution, badgeuse, pointeus, emprinte, emprunte, digital, biometric.
NadSoftware.com: sale of clocks (time clock) and badge readers in duty.
NAD Software: auto-company free of VAT.
NAD Software: for individuals, professionals, companies do not recoup the VAT and companies unwilling to pay the VAT.
Distributor Vedex solutions.
Attendance time system, jig, badge readers, pointing of working time, pointing schedules, time management, absence, presence, credit, debit, Extra hours, night hours.